Many of our customers used to worry about damaging their natural nails or ruining their beautiful press-ons. Luckily, learning how to remove your press-on nails is easy.
This guide breaks down the best techniques to safely take them off, whether you used glue or adhesive tabs.
With our expert tips, you’ll be able to gently remove your press-on nails, so you can enjoy them time and time again, giving you endless style options.
Table of Contents
- Gather Your Supplies: What You’ll Need to Remove Press-On Nails
- How Do You Safely Remove Press-On Nails at Home?
- The Classic Warm Water Soak: A Gentle Approach
- The Nourishing Oil Method: Dissolving the Glue
- How to Remove Stubborn Press-On Nails or Nail Glue?
- The Dental Floss Trick: For Faster Removal
- The Nail Buffer Method: Removing Leftover Adhesive
- Dealing with Stubborn Glue: When to Use Acetone
- How to Remove Press-On Nails to Reuse Them?
- Gentle Removal is Key: Preserving Your Press-Ons
- Cleaning and Storage: Prepping for Future Use
- How to Care for Your Natural Nails After Removing Press-Ons?
- Hydrate and Nourish: The Power of Cuticle Oil
- Strengthen and Protect: Maintaining Healthy Nails
- Frequently Asked Questions About Removing Press-On Nails
Gather Your Supplies: What You’ll Need to Remove Press-On Nails
Before embarking on your press-on nail removal journey, it’s essential to gather the right tools.
Having everything on hand ensures a smooth, damage-free experience, protecting both your natural nails and your stunning NaLayu press-on sets, keeping them looking their best for future use.
Just like a painter prepares their canvas, you’ll want to create the perfect setup for a successful removal.
Essential Tools for Every Method
No matter which removal method you choose, these are the must-have tools that form the foundation of your at-home kit:
- Warm Water: The foundation of the gentlest removal methods. It helps to soften the adhesive, making the process easier. According to the Occupational Safety and Health Administration (OSHA), warm water is an effective solvent, it can also be used for cleaning.
- Mild Soap: Adding a touch of mild soap, preferably one that is moisturizing, to your warm water soak can further aid in loosening the adhesive bond.
- Cuticle Oil: A true nail care hero, cuticle oil nourishes your nails and cuticles while helping to dissolve the glue. We recommend a high-quality formula (enriched with Vitamin E and jojoba oil) for optimal results, it provides deep hydration and promotes healthy nail growth.
- Cuticle Pusher or Orange Wood Stick: Used to gently lift the press-ons. You can find a variety of orange wood stick on the market. According to Wikipedia, Orange wood sticks were originally designed in the 1880s, and are typically made from the wood of orange trees, these versatile tools are still used by nail technicians today.
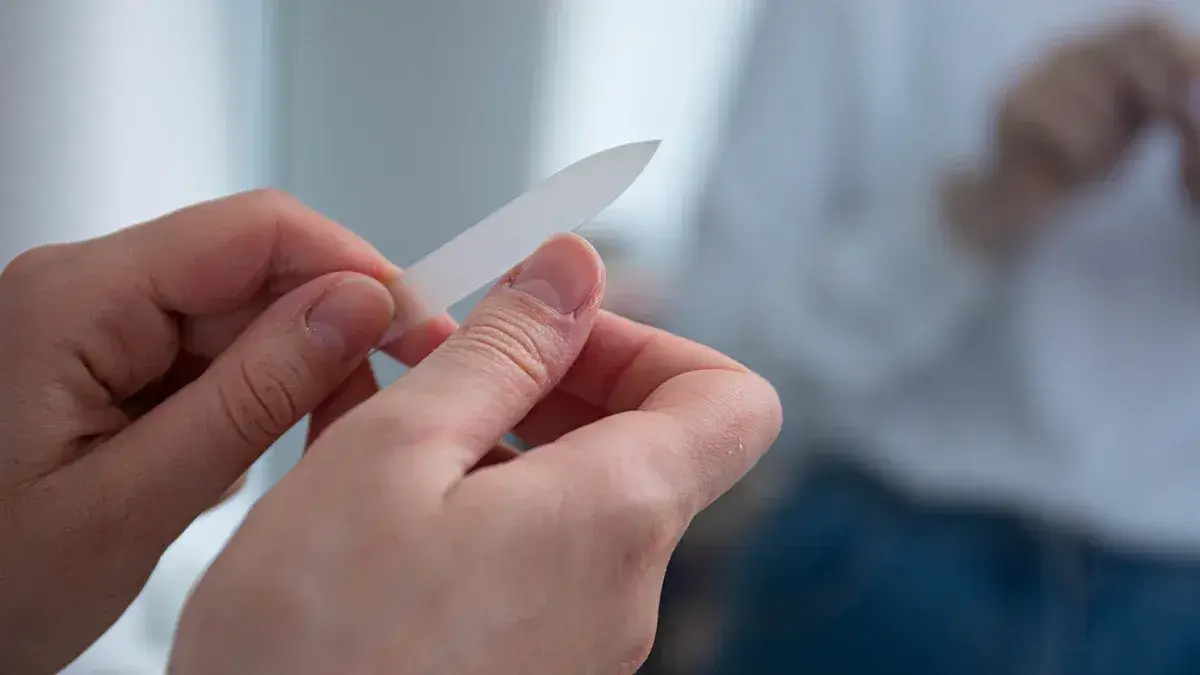
- Nail File and Buffer: A fine-grit nail file helps to gently file away any leftover adhesive residue, while a buffer smooths the nail surface.
- Small Bowl: For creating your warm water soak. Choose a bowl that’s just the right size for comfortably soaking your fingertips.
- Towel: To protect your work surface and dry your hands.
Method-Specific Supplies
For those times when a little extra help is needed, you might want to have these additional supplies on hand:
- Acetone (for stubborn glue): A powerful solvent that can dissolve even strong adhesives. We’ll discuss its safe use later. For more information on acetone and its properties, you can refer to this resource from the National Institutes of Health (NIH). – Learn our detailed guide of how to remove press on nails with acetone.
- Cotton Balls or Pads: For applying acetone or for use in the soaking method.
- Aluminum Foil (if using acetone soaks): Helps to trap heat and enhance the effectiveness of acetone.
- Dental Floss: A surprisingly useful tool for gently lifting press-ons, particularly useful when you’re trying to preserve them for reuse. Dental floss is not only a good tool for oral care, but it also plays an important role in the fashion industry.
- Non-Acetone Nail Polish Remover: If you do not want to cause harm to your natural nail bed, a non-acetone nail polish remover is a better choice.
Having these supplies readily available will empower you to tackle any press-on removal situation with confidence and care.
Remember, a gentle approach is always best, especially when preserving your natural nails and your gorgeous NaLayu press-ons for multiple uses. With your toolkit complete, you’re ready to move on to the next step.
How Do You Safely Remove Press-On Nails at Home?
Removing press-on nails doesn’t have to be a daunting task. In fact, with the right techniques, you can easily and safely remove them at home, preserving both your natural nails and your gorgeous NaLayu press-ons for future wear.
The Classic Warm Water Soak: A Gentle Approach
This method is favored because it relies on the simple, yet effective, solvent properties of warm water to soften the adhesive, as recommended by various health and safety guidelines, such as those provided by OSHA. It’s a natural and non-invasive way to loosen press-on nails.
Step #1 Prepare Your Soak: Fill a small bowl with warm (think bath temperature, not scalding) water and add a few drops of mild soap. The mild soap helps to emulsify the oils and loosen the adhesive that holds the press-on nails in place. This step is crucial as it prepares the nails for a gentler removal process. Using warm water is important as hot water can potentially damage your natural nails.
Step #2 Soak Your Nails: Soak your nails for 10-20 minutes, or until the press-ons begin to feel loose. Soaking allows the warm water to penetrate under the press-on nails, gently softening the glue that adheres them to your natural nails. The duration of soaking may vary depending on the type of nail glue used during application.
Step #3 Gentle Nudging: Gently try to lift the press-ons using a cuticle pusher, starting from the sides near the cuticle area. As the glue softens, you should be able to carefully work the cuticle pusher under the edge of the press-on nail. Gently wiggle the press-on to see if it’s loose. DO NOT force it.
Step #4 Repeat if Necessary: If you encounter resistance, soak for a few more minutes. Patience is key in this process. If the press-on nail does not lift easily, it indicates that the glue has not sufficiently softened. Returning your nails to the warm water for a few additional minutes should help to further loosen the adhesive. Never force the press-on nail off, as this can cause damage to your natural nail.
Step #5 Buff Away Residue: Once the press-on is off, use your nail buffer to gently buff away any remaining adhesive residue from your natural nail. Be sure to use a light touch to avoid thinning your nail plate.
Step #6 Dry and Inspect: Once all press-ons are removed, dry your hands with a soft towel. Now you can inspect your natural nails as well as your press-ons.
If the warm water soak alone doesn’t quite do the trick, or if you prefer a more nourishing approach, the oil method is an excellent alternative.
The Nourishing Oil Method: Dissolving the Glue Gently
The oil works by gradually penetrating the adhesive bond between the press-on and natural nail, weakening it over time.
This method is particularly beneficial as it not only aids in removal but also nourishes the cuticles and surrounding skin, promoting healthy nail growth.
This method not only helps remove press-ons but also conditions your nails and cuticles in the process.
Here’s how to do it:
Step #1 Choose Your Oil: Opt for a high-quality oil known for its nourishing properties. Great options include jojoba oil, coconut oil, or even olive oil.
Step #2 Apply Generously: Apply a generous amount of your chosen oil to each press-on nail, making sure to cover the entire surface and the edges where the adhesive is bonded. Use the dropper or brush applicator to work the oil under the edges of the press-on, if possible.
Step #3 Massage and Wait: Gently massage the oil into your cuticles and around the press-on nails. Allow the oil to sit for at least 5-10 minutes. This gives it time to penetrate the adhesive and start breaking it down.
Step #4 Gentle Lifting: Using your cuticle pusher or orange wood stick, gently try to lift the edges of the press-on nails. Start at the cuticle line and work your way around, applying gentle pressure.
Step #5 Reapply Oil as Needed: If the press-on feels resistant, apply more oil and wait a few more minutes. You can also try gently working the oil under the nail with your cuticle pusher.
Step #6 Gentle Nudging: Carefully and gently try to lift the press-ons using an orange wood stick or cuticle pusher. Start from the sides near the cuticle and work your way towards the center, gently checking if the press-on nail is loosening. Do not force it.
Step #7 Buff and Clean: Once the press-on is removed, use your nail buffer to gently remove any remaining adhesive from your natural nail. Then, wash your hands with mild soap and water to remove any excess oil.
Step #8: Moisturize: After removing all your press-ons, it is a good idea to moisturize your hands, you can use hand cream, or hand lotion from a downstream company that specializes in hand care products.
Now that you’ve mastered the gentler methods, let’s explore some additional tips for removing press-ons safely and caring for your natural nails afterward.
How to Remove Stubborn Press-On Nails or Nail Glue?
While the warm water soak and oil methods work wonders in most cases, there are times when you might encounter a more stubborn set of press-ons or some particularly persistent adhesive residue.
Before you reach for the heavy-duty solutions, it’s important to remember that patience and a gentle touch are still paramount.
However, when you do need a little extra help, these techniques can be effective. But remember to use these methods as a last resort. Always prioritize the health of your natural nails.
If you find that you regularly encounter stubborn glue, it might be worth reevaluating the type of adhesive you’re using or the application method.
One method that provides a bit more leverage without resorting to harsh chemicals is the dental floss trick.
The Dental Floss Trick: For Faster Removal
This method uses a piece of dental floss to gently separate the press-on from your natural nail. It’s a bit more forceful than soaking, so proceed with care.
Step #1 Choose Your Floss: Opt for a strong, unflavored, and unwaxed dental floss. A thicker floss may work best.
Step # 2 Prepare Your Nails: If possible, try soaking your nails in warm water for a few minutes to soften the adhesive slightly. This isn’t strictly necessary but can make the process easier.
Step #3 Slide and Saw: Gently slide the dental floss under the edge of the press-on nail, starting at the cuticle line or a corner where it might be slightly loose. Holding the floss taut, use a gentle sawing motion to work it back and forth, slowly moving it under the press-on.
Step #4 Work Slowly: Continue the sawing motion, gradually working the floss further under the nail. Avoid rushing the process, as this could damage your natural nail.
Step #5 Lift and Remove: As the floss progresses, the press-on should begin to lift. Continue until the entire press-on is free from your natural nail.
Even after removing the press-on, you might find some adhesive residue left behind. That’s where the nail buffer method comes in handy.
The Nail Buffer Method: Removing Leftover Adhesive
After removing your press-ons, you might notice some lingering adhesive residue on your natural nails. This is perfectly normal, and a nail buffer can help you gently remove it without damaging your nail plate.
Step #1 Choose the Right Buffer: Select a fine-grit nail buffer, preferably one with multiple grits, starting with the gentlest. You can find these at most drugstores or beauty supply stores, or conveniently in the NaLayu store.
Step #2 Gentle Buffing: Using the gentlest grit side of your buffer, lightly buff the surface of your natural nail where the adhesive residue remains. Use short, gentle strokes in one direction, avoiding excessive pressure.
Step #3 Check Your Progress: Periodically check your progress to ensure you’re only removing the adhesive and not thinning your natural nail.
Step #4 Gradual Grit: If the gentlest grit isn’t sufficient, you can gradually move to a slightly coarser grit. However, always err on the side of caution and use the least abrasive option that gets the job done.
Step #5 Final Touches: Once all the residue is gone, use the smoothing side of your buffer to give your nails a final polish.
For truly stubborn, resistant adhesive, you may need to consider using acetone, but only as a last resort.
Dealing with Stubborn Glue: When to Use Acetone
Acetone is a powerful solvent that can dissolve most nail adhesives, including stubborn glue.
However, it’s also very drying and can weaken your natural nails if used improperly.
Therefore, we recommend using acetone only when other methods have failed.
Remember that repeated or prolonged exposure to acetone can lead to dryness, brittleness, and even nail thinning.
- Ventilation is Key: Acetone has strong fumes, so work in a well-ventilated area. Open a window or turn on a fan to ensure proper airflow. For more information on indoor air quality, visit the Environmental Protection Agency website at www.epa.gov.
- Protect Your Skin: Apply a thin layer of petroleum jelly or a thick cream to the skin around your nails to create a barrier and minimize contact with acetone.
- Soaking Method:
- Pour a small amount of acetone into a glass or ceramic bowl.
- Soak your fingertips in the acetone for 5-10 minutes, or until you feel the glue starting to soften.
- Use an orange wood stick or cuticle pusher to gently lift the press-on nail. If it doesn’t come off easily, soak it for a few more minutes.
- Foil Method:
- Soak cotton balls in acetone.
- Place a soaked cotton ball on each nail.
- Wrap each fingertip with a small piece of aluminum foil to hold the cotton ball in place and create a mini-sauna effect.
- Leave the wraps on for 10-15 minutes.
- Remove the foil and cotton, and gently push off the softened press-on with an orange wood stick or cuticle pusher.
- Wash and Moisturize: After using acetone, wash your hands thoroughly with soap and water to remove all traces of the solvent. Then, apply a generous amount of cuticle oil or a rich hand cream to rehydrate your nails and skin. We highly recommend our NaLayu cuticle oil, specially formulated to replenish and nourish your nails after using any harsh chemicals.
How to Remove Press-On Nails to Reuse Them?
One of the greatest advantages of choosing high-quality press-on nails, like those we craft at NaLayu, is their reusability.
With the proper care and removal techniques, you can enjoy your favorite sets multiple times, making them a sustainable and cost-effective way to express your style.
The key to successful reuse lies in a gentle removal process that preserves both your natural nails and the integrity of the press-ons.
We’re committed to providing you with not just stunning press-on nails but also the knowledge to make them last.
The foundation of reusing press-ons is a removal process that prioritizes gentleness above all else.
Gentle Removal is Key: Preserving Your Press-Ons
When your goal is to reuse your press-ons, patience and a delicate touch are your most valuable tools.
Rushing the removal process or using excessive force can damage the press-ons, making them unsuitable for future wear. Here’s how to ensure they stay in tip-top shape:
Step #1 Start with a Soak or Oil: Just as with removal for disposal, begin with either the warm water soak or the nourishing oil method. This helps to loosen the adhesive bond without putting undue stress on the press-on. A 10-15 minute soak in warm, soapy water or a 5-minute soak in cuticle oil will do.
Step #2 Use the Dental Floss method carefully: Gently slide the dental floss under the edge of the press-on nail, starting at the cuticle line or a corner where it might be slightly loose. Holding the floss taut, use a gentle sawing motion to work it back and forth, slowly moving it under the press-on.
Step #3 Avoid Bending: As you gently lift the press-on, avoid bending or flexing it. This can cause cracks or weaken the structure, especially at the tip. Instead, focus on lifting it straight off your natural nail.
Step #4 Inspect for Damage: Once removed, carefully inspect each press-on for any signs of damage, such as cracks, bends, or excessive adhesive residue. If you spot any issues, it’s best to set that nail aside rather than attempting to reuse it.
With your press-ons safely removed, it’s time to prepare them for their next use.
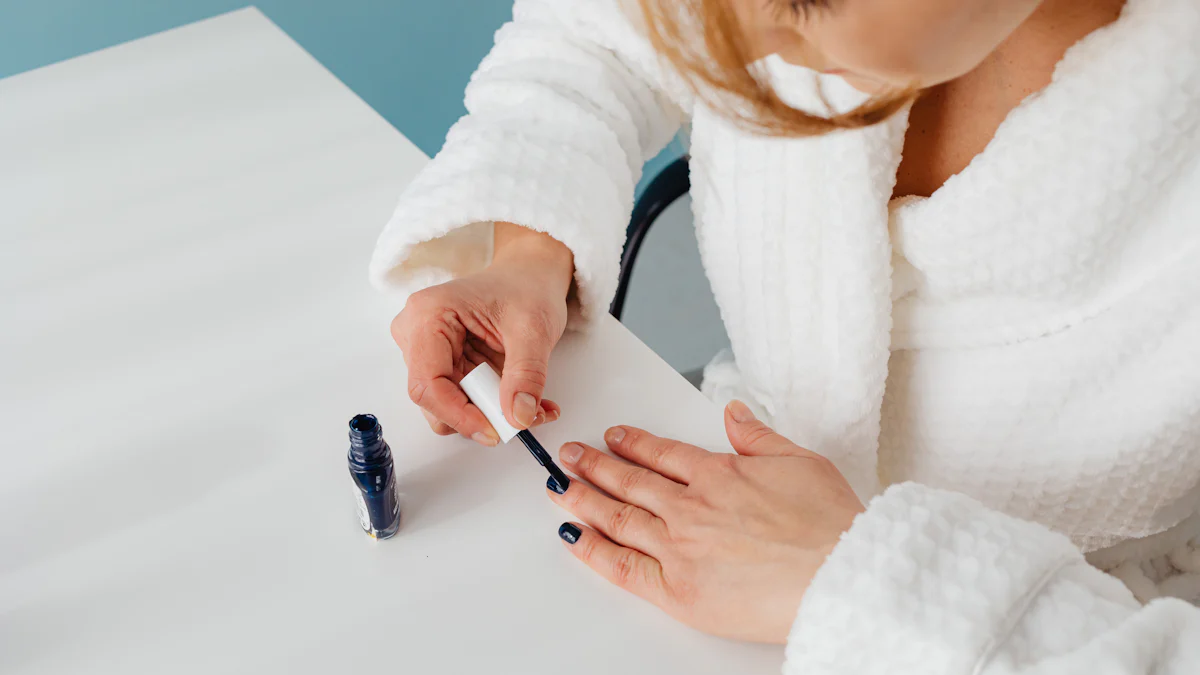
Cleaning and Storage: Prepping for Future Use
Proper cleaning and storage are crucial for maintaining the beauty and longevity of your reusable press-ons. Think of it as giving your tiny works of art the care they deserve.
Step #1 Remove Adhesive Residue: Gently remove any leftover adhesive from the underside of the press-on. You can use your orange wood stick to carefully scrape off larger pieces, then use a cotton pad soaked in a non-acetone nail polish remover to wipe away any remaining residue. For stubborn glue, you may try the nail buffer.
Step #2 Cleanse the Surface: Wipe down both the top and underside of each press-on with a cotton pad soaked in rubbing alcohol (isopropyl alcohol). This will remove any oils, dirt, or remaining adhesive remover, ensuring a clean surface for the next application. According to the Centers for Disease Control and Prevention (CDC), alcohol concentrations of 60%–80% are very effective at disinfecting. You can find more information on the CDC’s website: www.cdc.gov.
Step #3 Dry Thoroughly: Allow the press-ons to air dry completely before storing them. This prevents moisture from getting trapped, which could lead to bacterial growth or damage.
Step #4 Store Safely: Place your clean, dry press-ons in a dedicated storage case or a small, airtight container. NaLayu offers specially designed storage cases that are perfect for keeping your sets organized and protected. This keeps them safe from dust, damage, and accidental bending.
Now that your press-ons are prepped for their next wear, let’s turn our attention to your natural nails.
How to Care for Your Natural Nails After Removing Press-Ons?
Even with the gentlest removal methods, your natural nails can benefit from a little extra TLC after wearing press-ons. Proper aftercare ensures they stay strong, healthy, and ready for your next manicure, whether it’s another set of gorgeous NaLayu press-ons or a different nail look.
Step #1 Hydrate and Nourish: Apply a generous amount of cuticle oil to your nails and cuticles. This helps to replenish moisture and promote healthy nail growth. Our NaLayu cuticle oil is packed with nourishing ingredients that will leave your nails feeling pampered and revitalized.
Step #2 Moisturize Your Hands: Use a rich hand cream to hydrate the skin around your nails, which can sometimes become dry after wearing press-ons.
Step #3 Take a Break (If Needed): If you notice any signs of weakness or damage on your natural nails, consider taking a short break from press-ons or any nail enhancements. This allows your nails to recover and regain their strength.
Step #4 Maintain a Healthy Diet: Remember that healthy nails start from within. Ensure you’re consuming a balanced diet rich in vitamins and minerals that promote nail health, such as biotin, vitamin E, and iron. The National Institutes of Health (NIH) provides comprehensive information on nutrient needs and dietary guidelines. You can find this resource on their website: www.nih.gov.
Hydrate and Nourish: The Power of Cuticle Oil
Think of cuticle oil as a magic elixir for your nails. It’s a must-have in any nail care routine, especially after removing press-on nails.
This specially formulated oil works wonders in restoring moisture, promoting healthy growth, and keeping your nails looking their absolute best.
After removing your press-ons, your natural nails may experience some dryness. Cuticle oil helps to replenish the lost moisture, preventing brittleness and promoting flexibility.
Regular application of cuticle oil can stimulate healthy nail growth by nourishing the nail matrix, where new nail cells are formed.
Beyond the nails themselves, cuticle oil keeps the surrounding skin soft and supple, preventing painful hangnails and promoting a neat, well-groomed appearance.
While cuticle oil is a powerhouse on its own, maintaining overall nail health involves a few other key practices.
Strengthen and Protect: Maintaining Healthy Nails
Healthy nails are the foundation of any beautiful manicure, whether you’re wearing NaLayu’s press-ons or rocking your natural nails. Here’s how to keep them strong and protected:
- Moisturize Regularly: Just as you moisturize your face and body, your hands and nails need regular hydration too. Use a good quality hand cream throughout the day, especially after washing your hands. Look for ingredients like shea butter, ceramides, and hyaluronic acid, which are known for their moisturizing properties.
- Eat a Nail-Friendly Diet: Your diet plays a significant role in the health of your nails. Ensure you’re getting enough of the following nutrients:
- Biotin: This B vitamin is essential for nail growth and strength. Find it in eggs, salmon, avocado, and nuts.
- Vitamin E: A powerful antioxidant that protects nails from damage. Find it in almonds, spinach, and sunflower seeds.
- Iron: Iron deficiency can lead to brittle, spoon-shaped nails. Include red meat, beans, and fortified cereals in your diet.
- Protein: Nails are made of protein, so make sure you’re getting enough from sources like lean meats, fish, eggs, and legumes.
- Omega-3 Fatty Acids: These healthy fats contribute to nail flexibility and shine. Find them in fatty fish like salmon and tuna, as well as in flax seeds and walnuts. You can find comprehensive information on nutrient needs and dietary guidelines on the National Institutes of Health (NIH) website: www.nih.gov.
- File and Shape Properly: Always file your nails in one direction to prevent splitting and weakening. Choose a fine-grit file and avoid sawing back and forth. Shape your nails according to your preference, but keep in mind that shorter, rounded nails are generally less prone to breakage.
- Protect Your Nails from Harsh Chemicals: When doing household chores or using cleaning products, wear gloves to protect your nails from harsh chemicals that can strip away their natural oils and weaken them.
- Avoid Over-Buffing: While buffing can create a smooth surface, over-buffing can thin your nails and make them more susceptible to damage. Limit buffing to once a month or less.
- Take Breaks from Nail Enhancements: While NaLayu press-ons are designed to be gentle, it’s still a good idea to give your natural nails an occasional break from any type of enhancement, including polish, gels, and acrylics. This allows them to breathe and recover.
- Stay Hydrated: Drinking plenty of water is essential for overall health, including nail health. Proper hydration helps keep your nails flexible and less prone to breakage.
Embrace Effortless Style with NaLayu
In conclusion, removing your press-on nails, whether for disposal or reuse, doesn’t have to be a struggle.
By following these guidelines and prioritizing gentle techniques, you can confidently remove your NaLayu press-ons while keeping your natural nails healthy and strong.
Now that you’re equipped with the knowledge to remove and care for both your press-ons and your natural nails, you’re ready to explore the world of effortless style with NaLayu’s stunning, reusable collections. Discover your next favorite look today!
FAQs
Here, we’ll answer some of the most common questions you might have about removing press-on nails.
Can rubbing alcohol remove press on nails?
Rubbing alcohol (isopropyl alcohol) can help remove press-on nails, but it’s not the most effective or gentlest method. While it can help dissolve the adhesive, it’s not as powerful as acetone and may require more time and effort. It can also be drying to the nails and surrounding skin, so using a non-acetone nail polish remover is recommended. If you do use rubbing alcohol, be sure to moisturize your nails and cuticles thoroughly afterward.
What type of oil to remove press-on nails?
Several types of oil can be effective for removing press-on nails. Some of the best options include:
- Cuticle Oil: Specially formulated for nail care, cuticle oil is an excellent choice. NaLayu’s cuticle oil is a great option.
- Jojoba Oil: Closely mimics the natural oils produced by your skin, making it highly moisturizing.
- Coconut Oil: Known for its moisturizing and antifungal properties.
- Olive Oil: A readily available household staple that can also help loosen adhesive.
Why won’t my press on nails come off?
If your press-on nails are stubbornly refusing to budge, it could be due to several factors:
- Strong Adhesive: You may have used a particularly strong nail glue.
- Insufficient Soaking Time: You may not have soaked your nails in warm water or oil long enough to loosen the adhesive.
- Improper Technique: You may be using too much force or not the correct technique when trying to lift the press-ons.
- Thick Glue Application: If a thick layer of glue was used during application it will take longer for it to dissolve.
How do you remove press on nails cured with gel?
Press-on nails cured with gel require a different approach than those applied with traditional glue. You’ll need to:
- File the Top Coat: Gently file the top layer of the gel to break the seal.
- Soak in Acetone: Soak your nails in acetone for 10-15 minutes, or use the foil method (wrapping acetone-soaked cotton balls around each nail with foil).
- Gently Push: Use an orange wood stick or cuticle pusher to gently push off the softened gel. You may need to repeat the soaking process a few times.
- Buff and Moisturize: Lightly buff your natural nails to remove any remaining residue and apply cuticle oil to rehydrate.
How do you make press on nails come off faster?
While patience is key to preventing damage, here are a few tips to potentially speed up the removal process:
- Use Warm Water: Soaking in warm, soapy water is generally the most effective and gentle way to loosen adhesive.
- Apply Oil: Cuticle oil or other nourishing oils can help dissolve the glue more quickly.
- Try the Dental Floss method: The dental floss method can be quicker than soaking, but use it with extreme caution to avoid damaging your natural nails.
- Combine Methods: You can try combining the warm water soak with the oil method for a more potent effect. But avoid combining the water method with the dental floss method.
Leave a comment